Clear aligners like Invisalign and ClearCorrect have revolutionized orthodontic treatment, offering a nearly invisible and removable alternative to traditional braces. While putting your aligners in is usually a breeze, removing them—especially when they’re new or fit tightly—can sometimes be a challenge. If you’re struggling to take your aligners out without discomfort or frustration, don’t worry. Here’s a simple guide on how to remove your clear aligners easily and safely.
Start from the Back
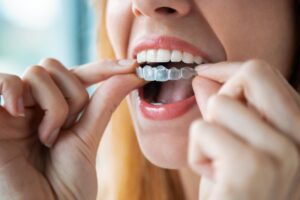
One of the easiest and most effective techniques is to start removing your aligners from the back molars. Use your fingertips to gently lift the edge of the aligner off your back teeth on one side, then do the same on the other side. Once both sides are loose, you can work your way forward and gently pull the aligner off the front teeth.
Starting at the back helps prevent the aligner from bending or cracking, which can happen if you try to pull from the front or middle first.
Use an Aligner Removal Tool
If you’re finding it tricky to get a grip on your aligners—especially if your nails are short or the fit is snug—consider using a removal tool. These small plastic tools are specially designed to help you pop out your aligners with ease. They’re inexpensive, easy to carry, and help keep your fingers out of your mouth (a plus for hygiene, especially when you’re on the go).
Try Dry Hands or a Paper Towel
A secure grip makes all the difference. If your fingers are wet or slippery, try drying them completely or use a paper towel for better traction. Gently grip the edge of the aligner and pull it away from your teeth using controlled pressure. This method gives you more control and prevents slipping or jerky movements that could damage the aligner.
Don’t Rush
It’s tempting to remove your aligners quickly, especially when you’re ready to eat. But being too forceful or impatient can damage the aligners or cause discomfort. Take your time, and if the aligners are particularly tight, try waiting a few minutes after drinking something warm (not hot) to slightly relax the plastic.
Practice Good Hygiene
Always wash your hands thoroughly before and after removing your aligners. Keep your aligners clean by storing them in their case when not in use and avoid using sharp objects or biting down to loosen them. These actions can damage your aligners or even injure your gums.
Stay Calm During the First Few Days
New aligners can feel extra snug for the first day or two as your teeth begin to shift. Don’t be alarmed if they’re harder to remove at first—it’s a sign that they’re working! With time and practice, you’ll develop a smooth routine and removing them will become second nature.
Removing your clear aligners doesn’t have to be a struggle. By starting from the back, using the right tools, maintaining a firm grip, and staying patient, you can remove your aligners quickly and comfortably. If you’re still having trouble, ask your orthodontist for a demonstration; they’ll be happy to help you master the technique.
About the Author
Dr. Cristina Herrera earned her dental degree from the University of Oklahoma before training for an additional year during a General Practice Residency at Michael Reese Hospital in Chicago. She has remained committed to learning, logging over 100 years each year in continuing coursework through renowned institutions like Spear Education. Dr. Herrera also stays current in her field through memberships in the American Dental Association and the California Dental Association. If you’re interested in Invisalign clear aligner treatment, let our team provide the solution! Schedule an appointment through our website or call (408) 378-8773.